[cq_vc_hotspot image=”323″ icontype=”number” position=”29.397%|77.309%,37.069%|55.51%,41.111%|47.3%,38.222%|91.352%,50.992%|73.987%,12.552%|86.372%,60.013%|16.528%,61.296%|1.538%,61.296%|28.538%” iconbackground=”rgba(30,115,190,0.8)” circlecolor=”#ffffff” trigger=”click” maxwidth=”320″][hotspotitem]
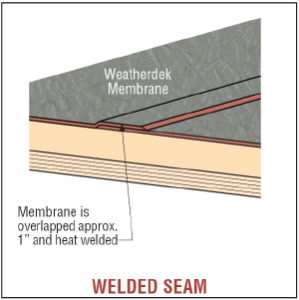
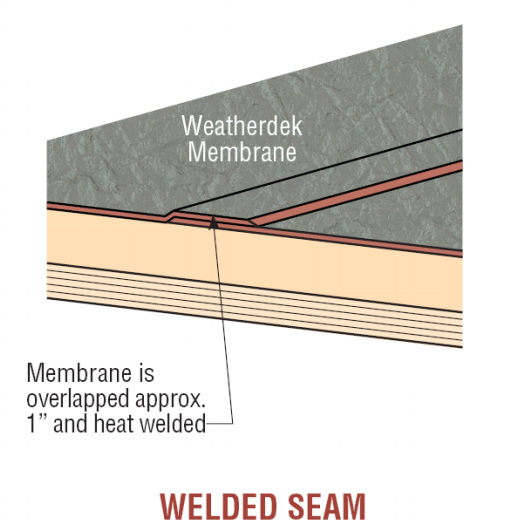
All seams and detail areas are heat welded together to form a 100% waterproof seal.
watch video
[/hotspotitem]
[hotspotitem]
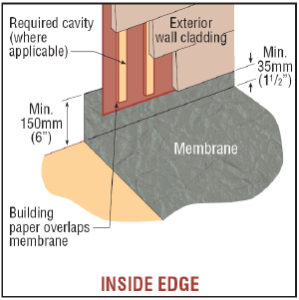
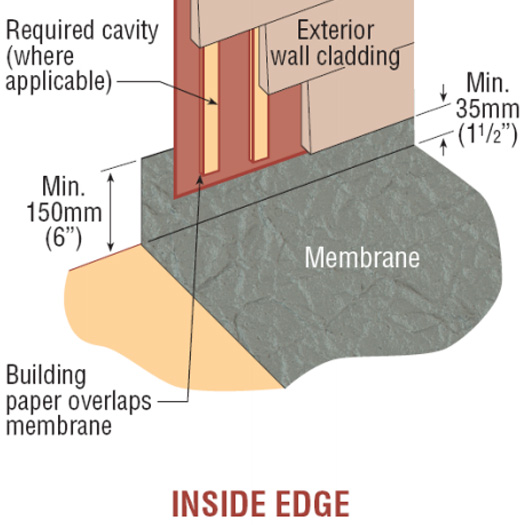
Weatherdek membranes are extended up the wall of the building, behind the cladding for proper overlap and flow of moisture away from the building.
watch video
[/hotspotitem]
[hotspotitem]

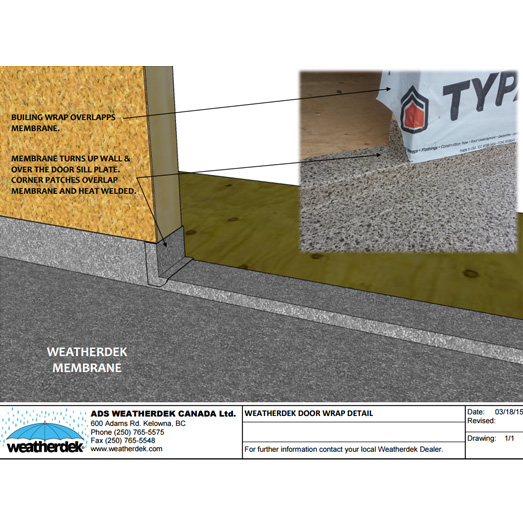
Door sills are wrapped up all sides with the Weatherdek membrane to ensure a completely waterproof door sill detail. The door is sealed to the sill upon installation.
watch video
[/hotspotitem]
[hotspotitem]
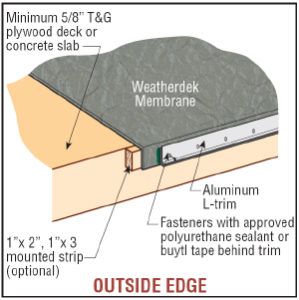
The Weatherdek membrane is wrapped over the outside edge, and mechanically fastened in place with the Weatherdek ‘L-Trim’ mechanical fastener.
watch video
[/hotspotitem]
[hotspotitem]
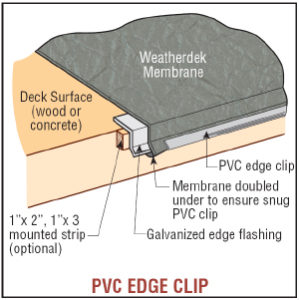
The Weatherdek membrane is wrapped over the outside edge, and mechanically fastened in place with the Weatherdek ‘L-Trim’ mechanical fastener.
watch video
[/hotspotitem]
[hotspotitem]
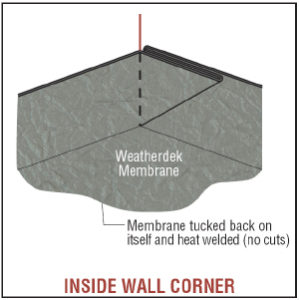
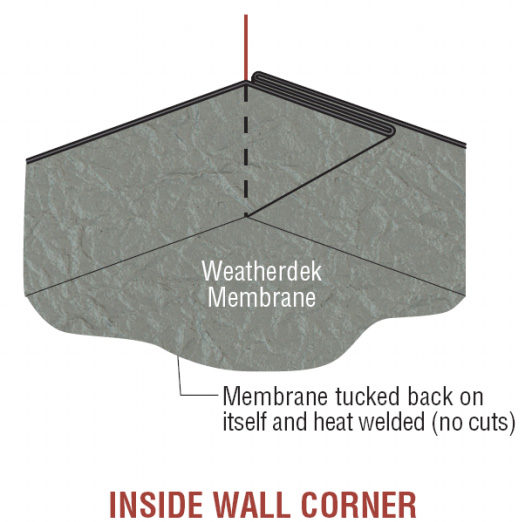
For an Inside wall corner, the Weatherdek membrane is folded onto itself and heat welded in place to form a neat corner with no cuts in the membrane.
watch video
[/hotspotitem]
[hotspotitem]
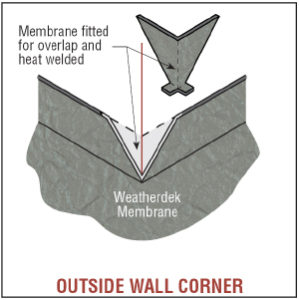
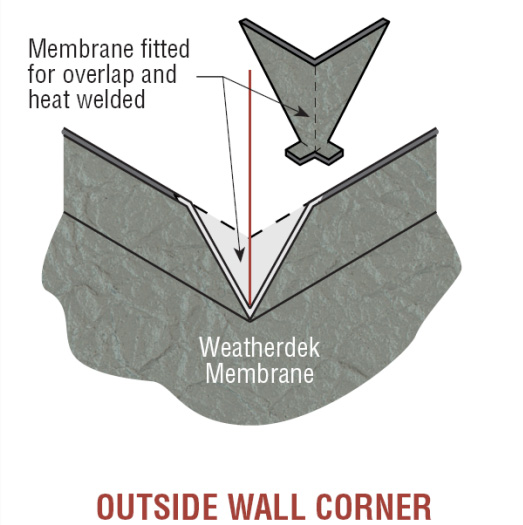
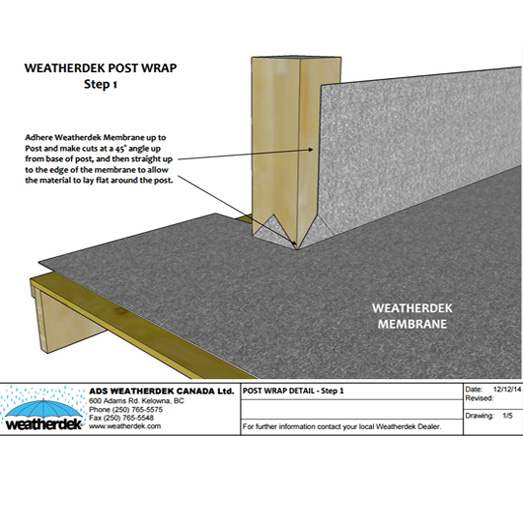
The Weatherdek membrane is cut to continue around an outside wall corner, and an additional pc of membrane is fitted over the existing membrane and heat welded in place.
watch video
[/hotspotitem]
[hotspotitem]
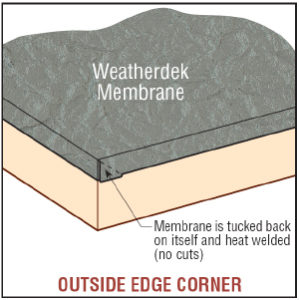
The Weatherdek membrane is cut to continue around an outside wall corner, and an additional pc of membrane is fitted over the existing membrane and heat welded in place.
watch video
[/hotspotitem]
[hotspotitem]
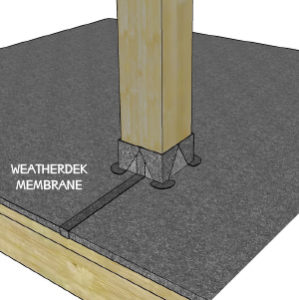
The Weatherdek membrane is cut to continue around an outside wall corner, and an additional pc of membrane is fitted over the existing membrane and heat welded in place.
watch video
[/hotspotitem][/cq_vc_hotspot]

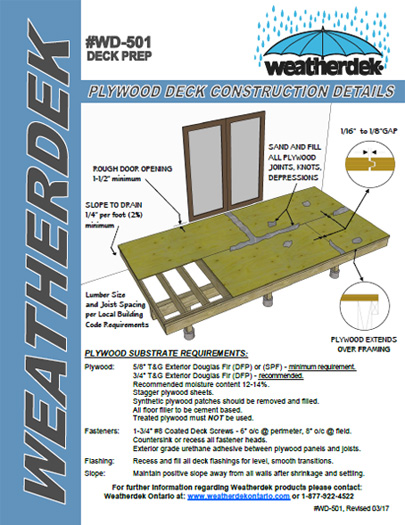
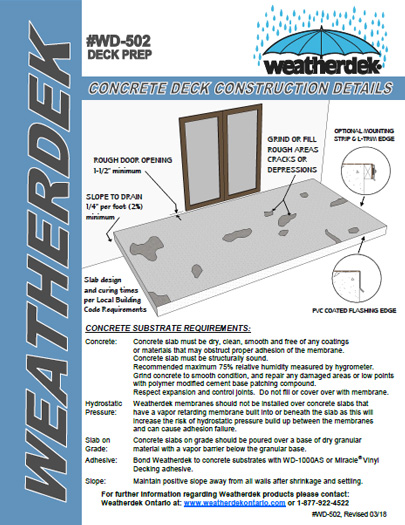
 All seams and detail areas are heat welded together to form a 100% waterproof seal.
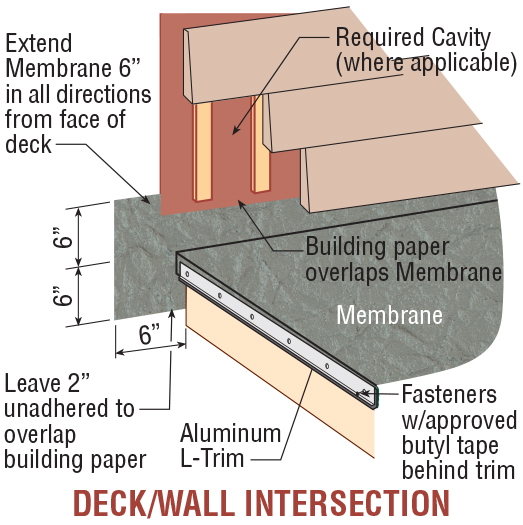
 Weatherdek membranes are extended up the wall of the building, behind the cladding for proper overlap and flow of moisture away from the building.
 Door sills are wrapped up all sides with the Weatherdek membrane to ensure a completely waterproof door sill detail. The door is sealed to the sill upon installation.
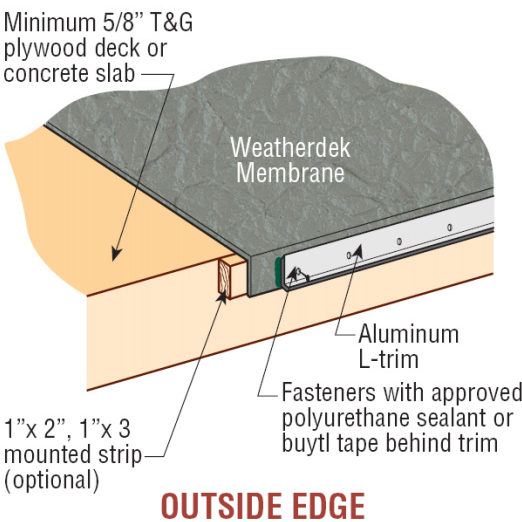
 The Weatherdek membrane is wrapped over the outside edge, and mechanically fastened in place with the Weatherdek ‘L-Trim’ mechanical fastener.
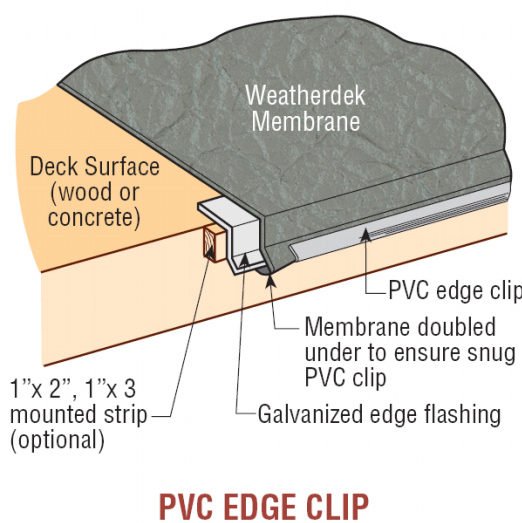
 The Weatherdek membrane is wrapped over the outside edge, and mechanically fastened in place with the Weatherdek ‘L-Trim’ mechanical fastener.
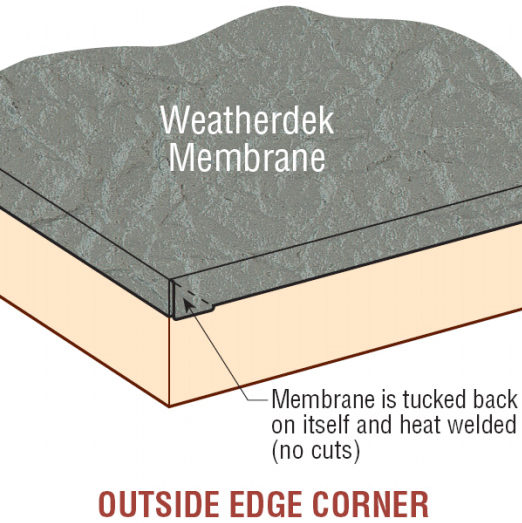
 For an Inside wall corner, the Weatherdek membrane is folded onto itself and heat welded in place to form a neat corner with no cuts in the membrane.
 The Weatherdek membrane is cut to continue around an outside wall corner, and an additional pc of membrane is fitted over the existing membrane and heat welded in place.
 The Weatherdek membrane is cut to continue around an outside wall corner, and an additional pc of membrane is fitted over the existing membrane and heat welded in place.
 The Weatherdek membrane is cut to continue around an outside wall corner, and an additional pc of membrane is fitted over the existing membrane and heat welded in place.
